
How to Record In Extreme Winds
I’ve now come back from living on a Sub-Antarctic Island for 12 months. Before my journey down south began, I decided to go all-in to create a ‘Sub-Antarctic Winds’ library. I looked into how best to record the extreme winds that occur on an island in the middle of the Southern Ocean. Winds that range from a frequent and strong 30 knots (~50km/h), to a peak of around 95 knots (~170km/h).
I researched for many hours, however I found no solution to the high winds. Instead, over the course of my preparations for creating this library and the year that followed of recording and editing, I found that there is no ‘solution’, but rather a series of controls that will improve the quality of extreme wind recordings and reduce wind noise.
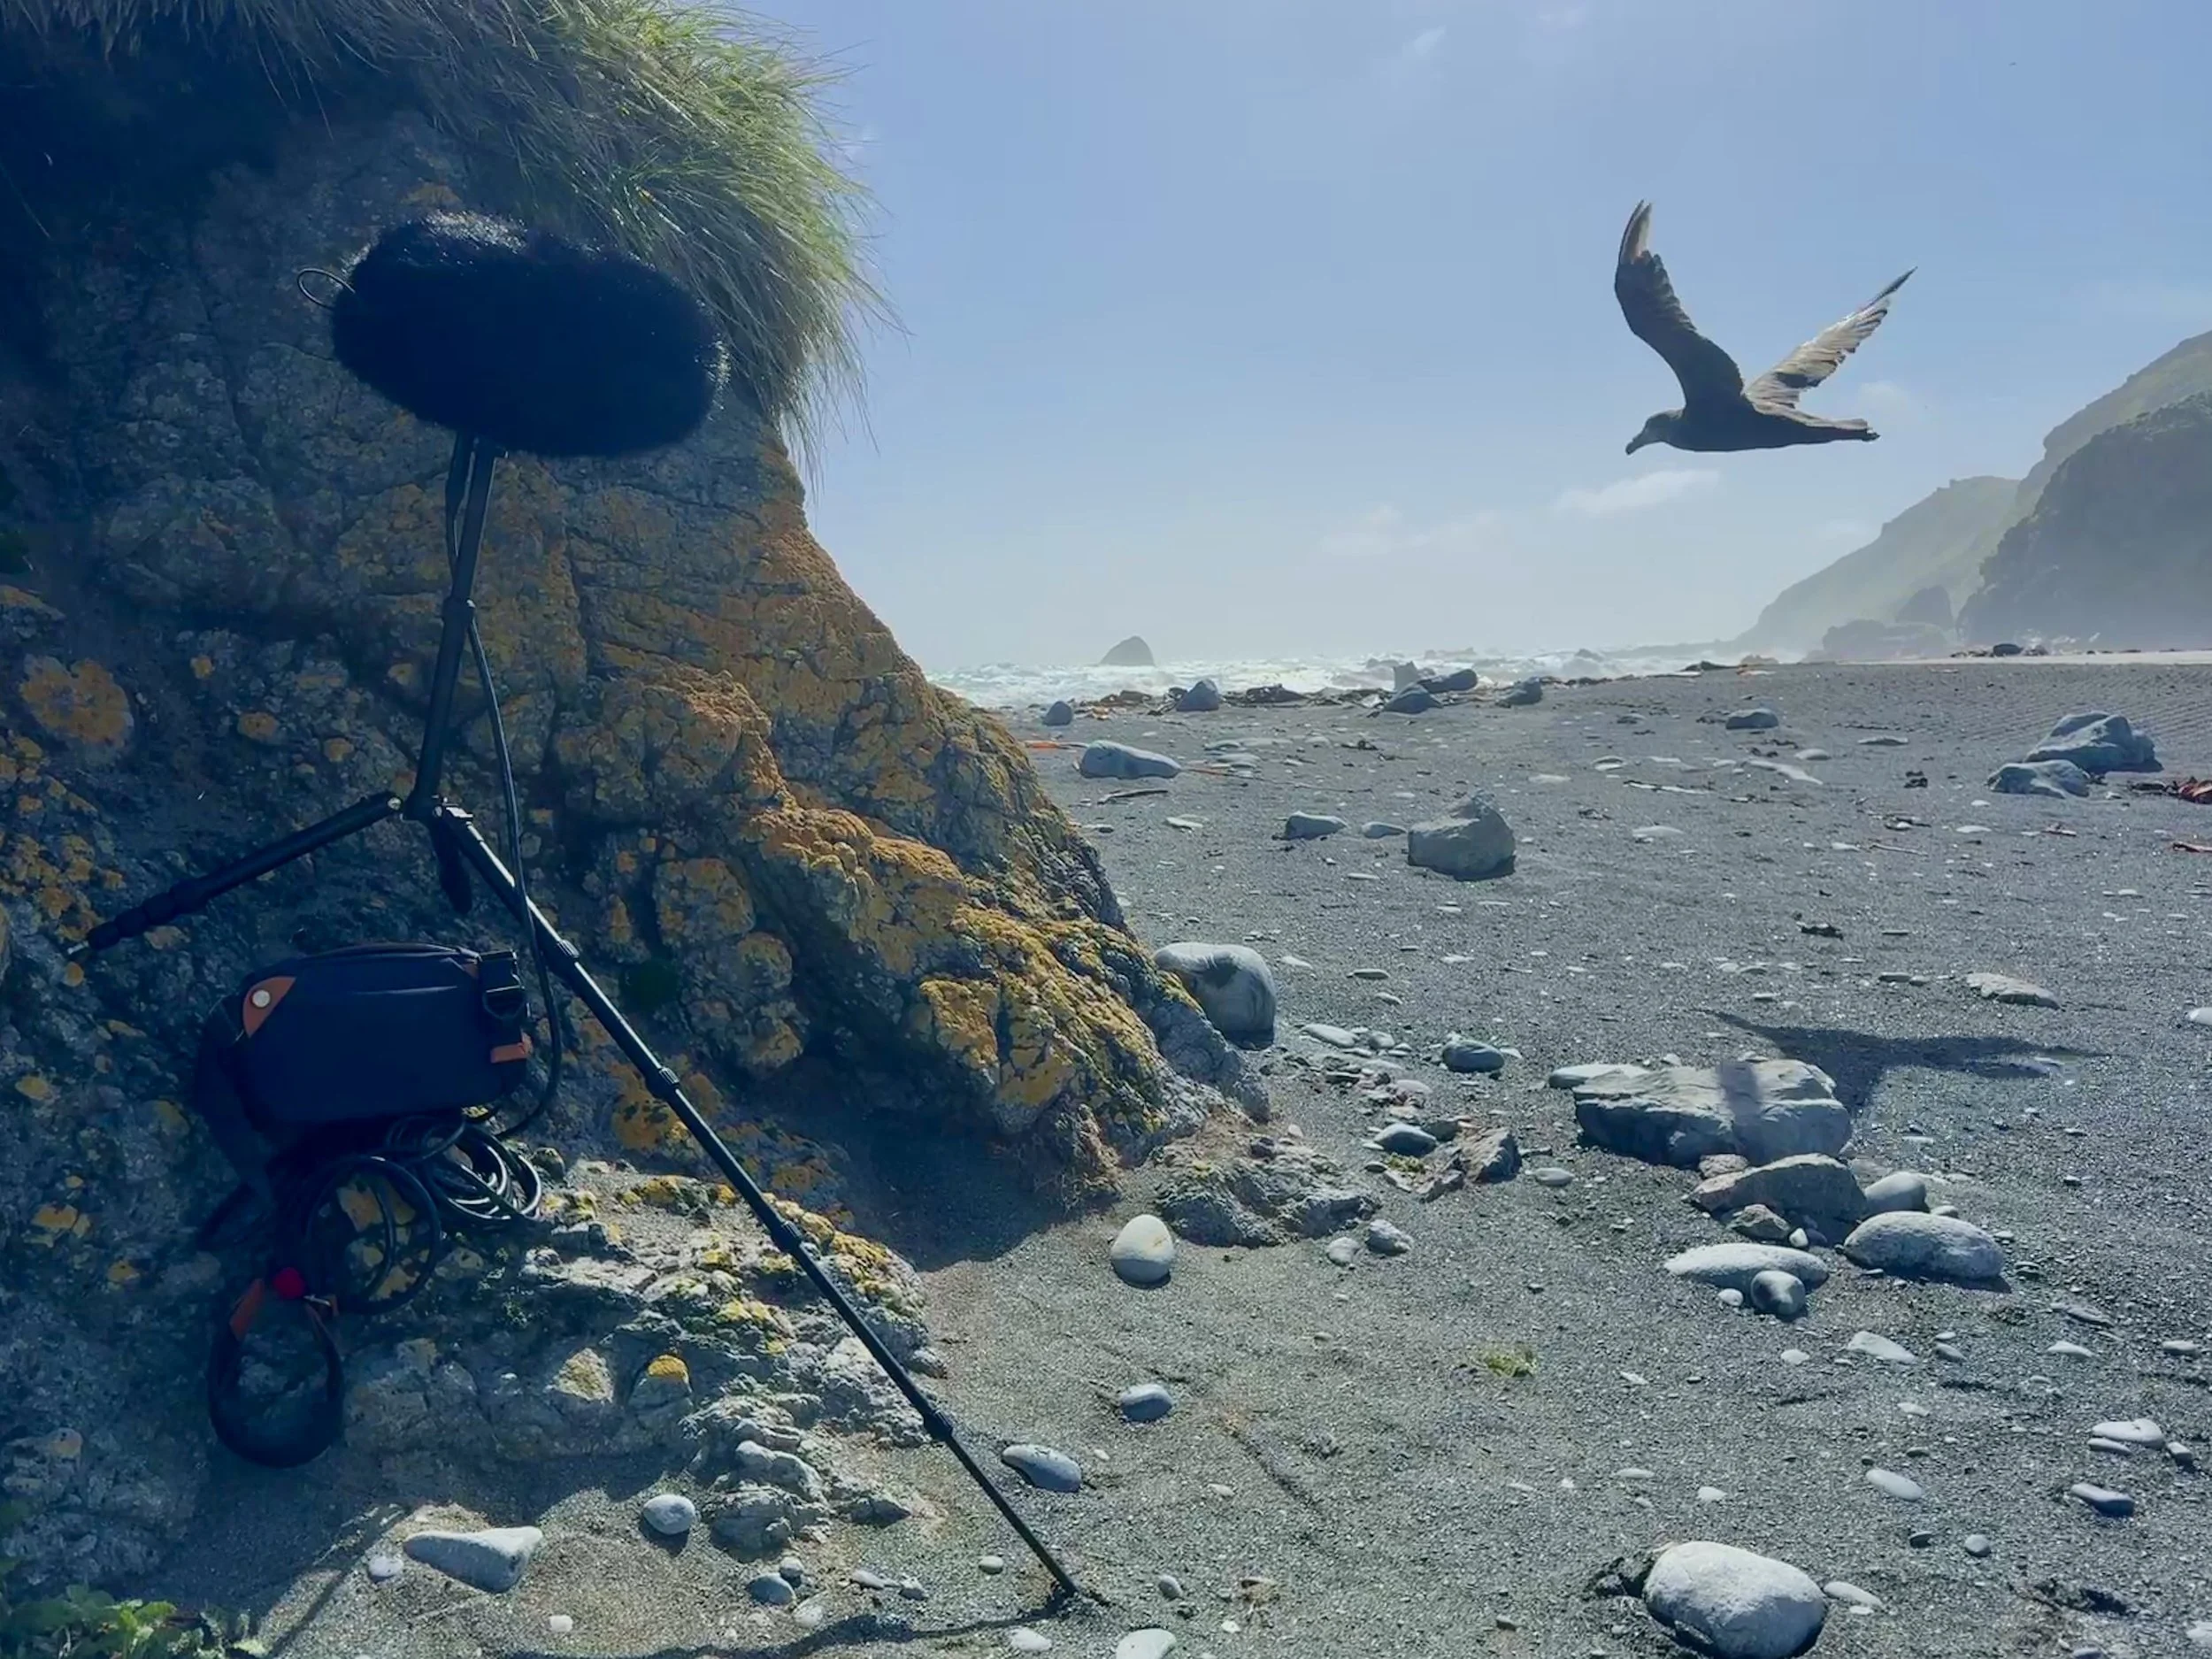
A Giant Petrel soars in the wind. These birds are so heavy that they cannot take flight without a significant run-up or a strong headwind.
Mics set up behind a large boulder to record the sound of wind battering the rock, shifting sands and rustling the tussock grasses.
Understanding why recording wind is so difficult is the first step towards capturing great wind recordings.
Sound is air pressure waves. It is compression and rarefaction of air, or waves of low air pressure followed by higher air pressure. Wind is the movement of air caused by differences in atmospheric pressure.
Sound and wind are very similar; any barrier against one is also a barrier to the other. To prevent wind from buffeting the microphone's diaphragm, a physical barrier is necessary, though it will always affect the sound.
The Controls:
Commercial Wind Protection: A blimp, a wind sock, and a windjammer.
Commercial wind protection makes a big difference and is essential for almost any outdoor recording. However, they have limits. I’ve found a good blimp with a wind sock and a windjammer eliminates wind noise at speeds up to around 20kn (~40km/h), with winds up to 30kn (~50km/h) being usable with some wind noise removal in post. A handheld recorder with wind protection will handle wind up to around 20kn, though some audible wind noise will still be captured.
*Keep in mind these numbers are not measurements I have made, but generalised findings from a year recording winds. Different set-ups will produce varied results, but I expect you won’t find reasonably transparent commercial wind protection that does much better than those numbers.
These solutions cannot ever completely solve the problem, as any solution that stops wind (air movement) will also affect the sound waves the microphone picks up. High frequencies are most affected by wind protection and physical barriers.
If you expect to record in winds above 30kn (~50km/h), you’ll need to do more than just these items.
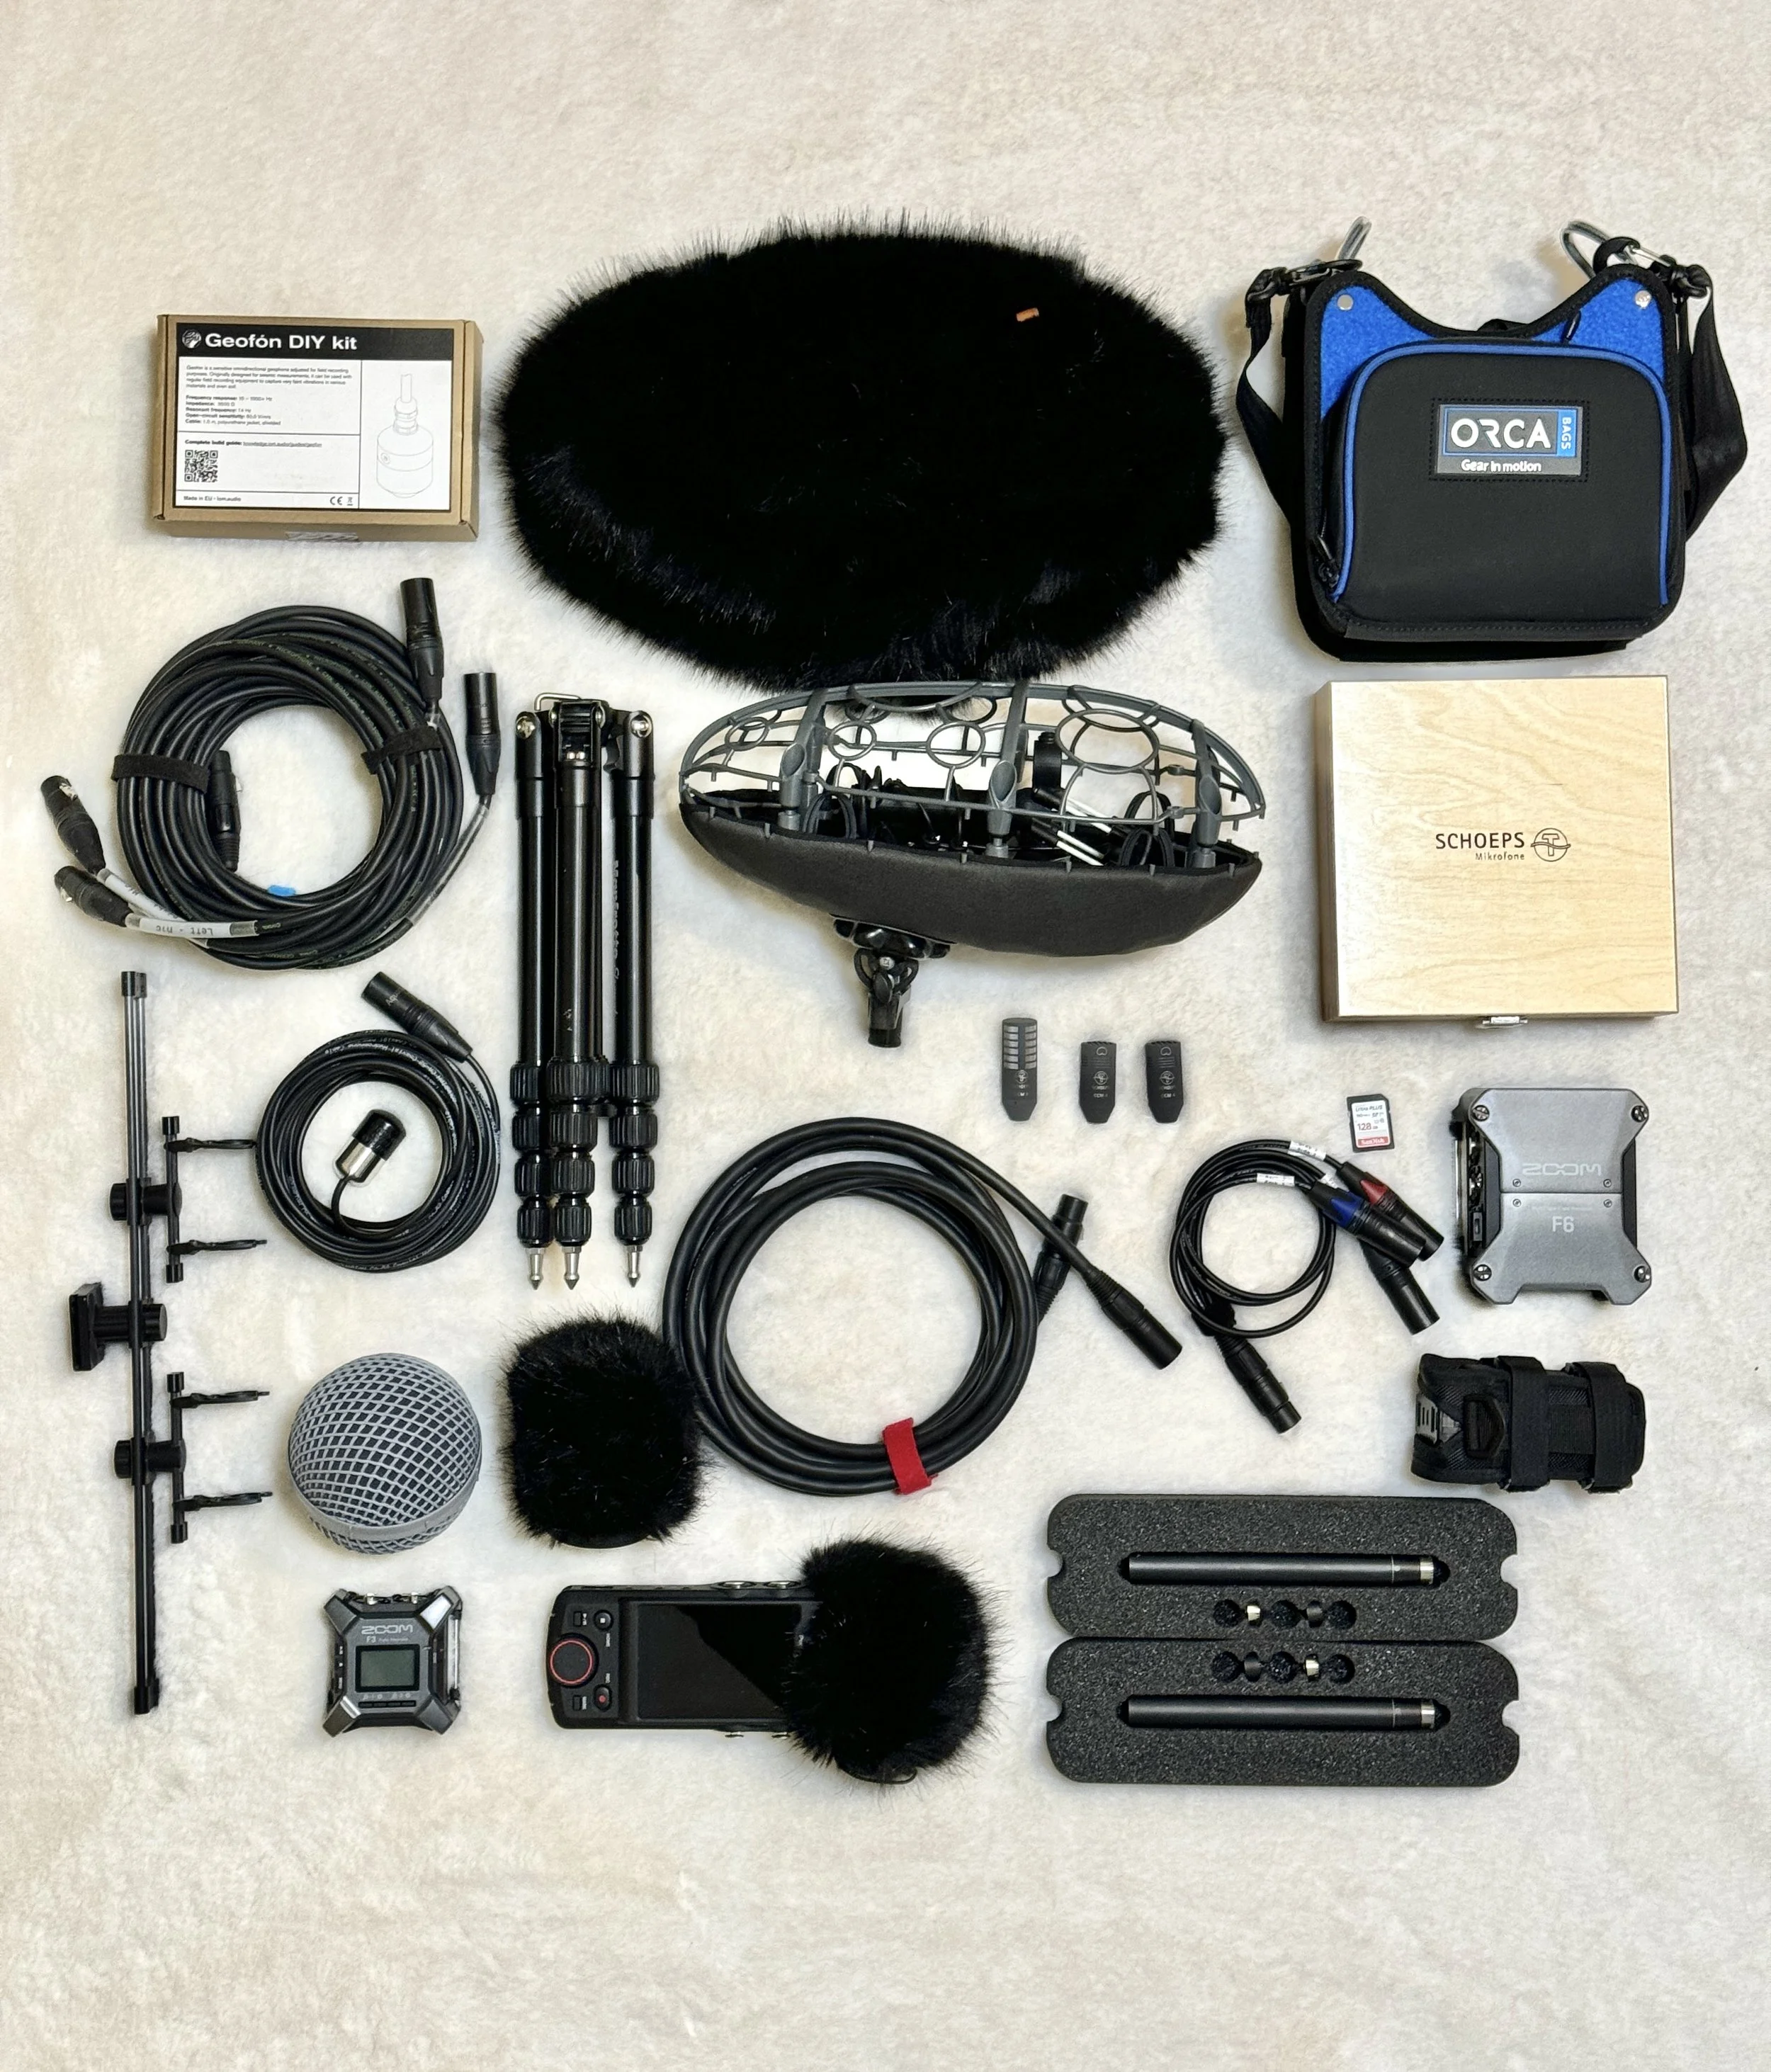
Wind protection and recording gear.
I use a blimp with a sock and a windjammer on any mic when recording winds.
2. Get Out Of The Wind!
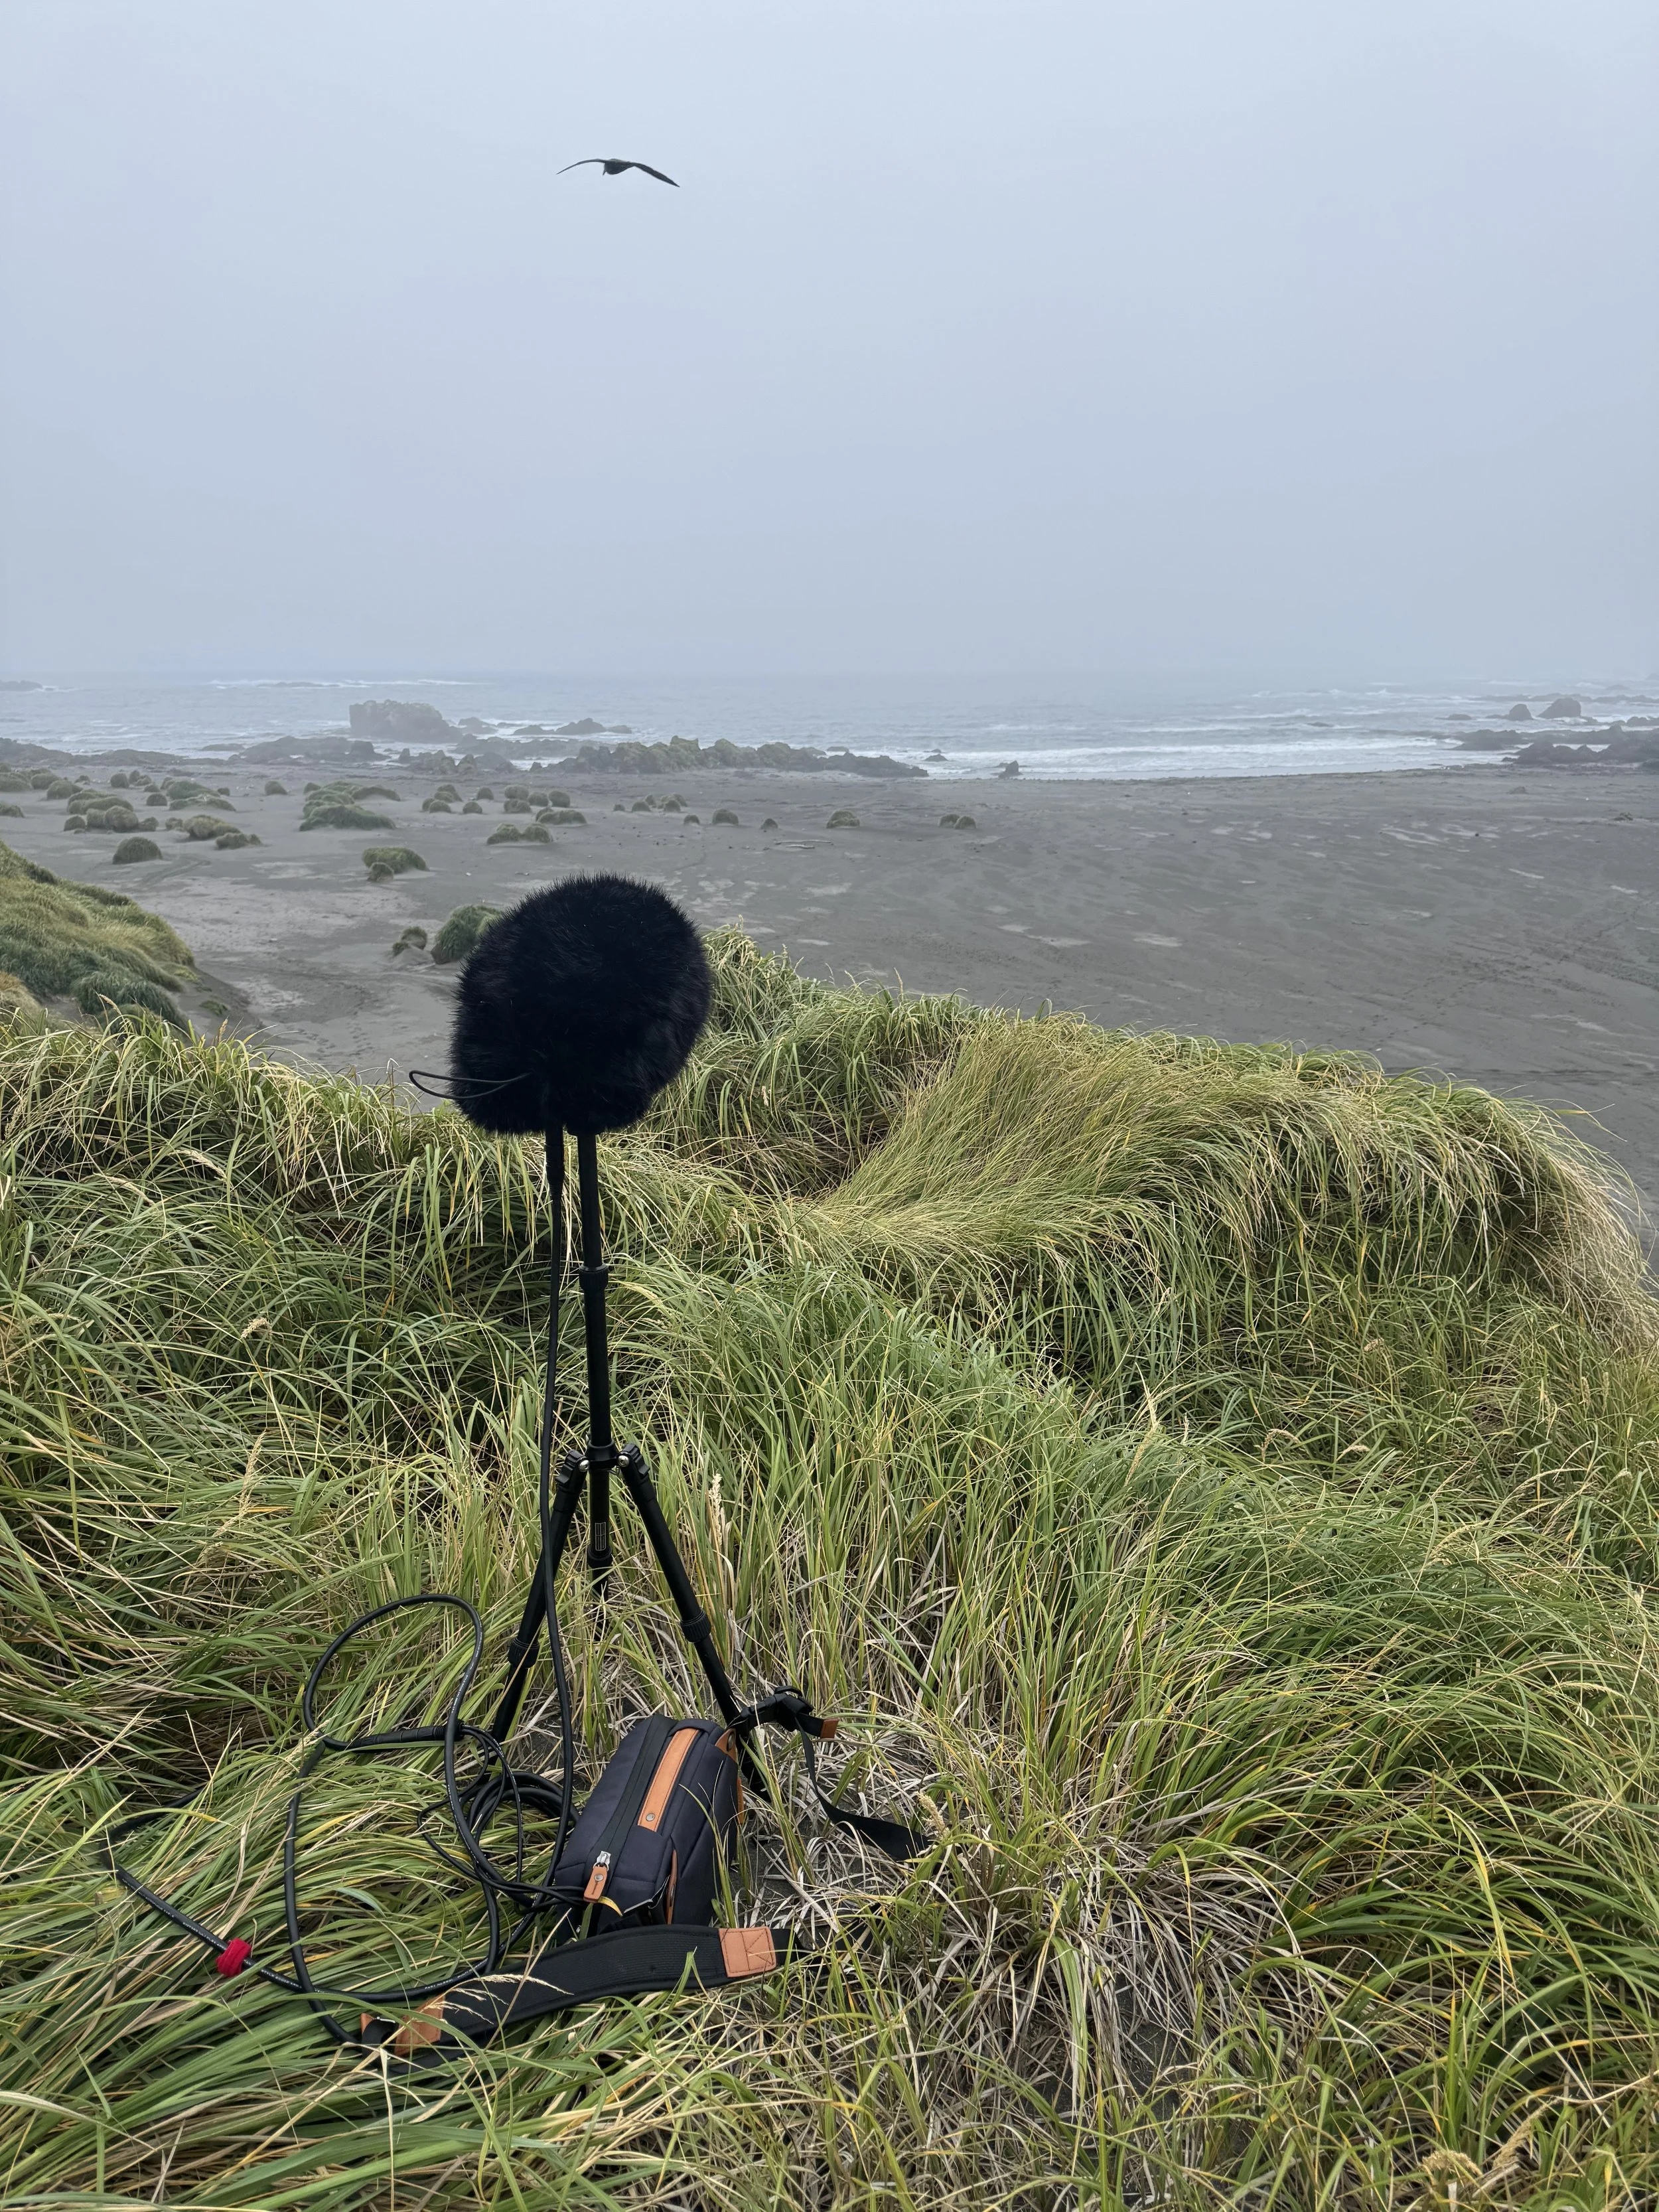
This is the one I struggled to accept. The reality is that to record in winds of 20 to 30 knots or more, you must find shelter for your microphones. This can be difficult, as you need an area that is not only interesting sonically but also has shelter or a low-wind pocket.
Shelter can take many forms and be dictated by wind direction. If you are getting a strong westerly wind, you can look for a natural physical barrier, such as a large rock, sand dune, cliff wall, or ditch, that protects from westerlies. You may find that a planned shelter doesn’t work on the day, due to wind direction. I highly suggest being aware of both the predicted wind strength and wind direction of your recording location before setting out.

Take note of your predicted wind speeds and direction.
This will help you pack the right wind protection and inform your mic placement decisions when you arrive on location.
Low Wind Pockets: Depending on terrain and wind direction, wind will behave in interesting ways. Before choosing a location for my microphones, I will walk around the area and feel the wind strength in areas near my target sound source. This can sometimes reveal a low-wind pocket I might have missed otherwise. Though it is important to note that any change in wind direction can affect how the area directs wind, therefore this method may only work for a short recording of a few minutes, before excessive wind noise comes through. But when faced with a location free from shelter, you may find a few good minutes.
3. Take Alternate Location Recordings
As field recordists, we usually take headphones to listen to our source live, before hitting record. However, when recording very loud winds, it is quite a challenge to listen to your microphones when everything around you is being loudly buffeted. So, if possible, take a handful of recordings from the same sound source in different sheltered locations, and review them later in a calm environment. You may find one of the locations proved better for wind noise reduction. This practice can sometimes be the difference between a failed recording trip and a successful one.
4. Record in 32-bit
Outside wind recordings can be far more dynamic than you might expect. It depends on how much wind noise your mics are exposed to and on the strength of the gusts relative to the average wind speed. The stronger the winds, the greater the potential dynamic range of the recording. Getting your levels right on a 24-bit system is hit-or-miss with strong, unpredictable winds.
Using a 32-bit recorder allows for this incredible dynamic range and reduces or eliminates clipping when wind noise is captured. This allows you to cut out the low end in post and sometimes leave an intact recording even after encountering minor wind noise.
5. Editing
Assuming you want a natural and realistic recording, the goal in the editing stage is to clean up the recording—i.e., remove unwanted wind noise and other extraneous noise —with minimal, transparent edits.
I find iZotope RX Audio Editor extremely usful here.
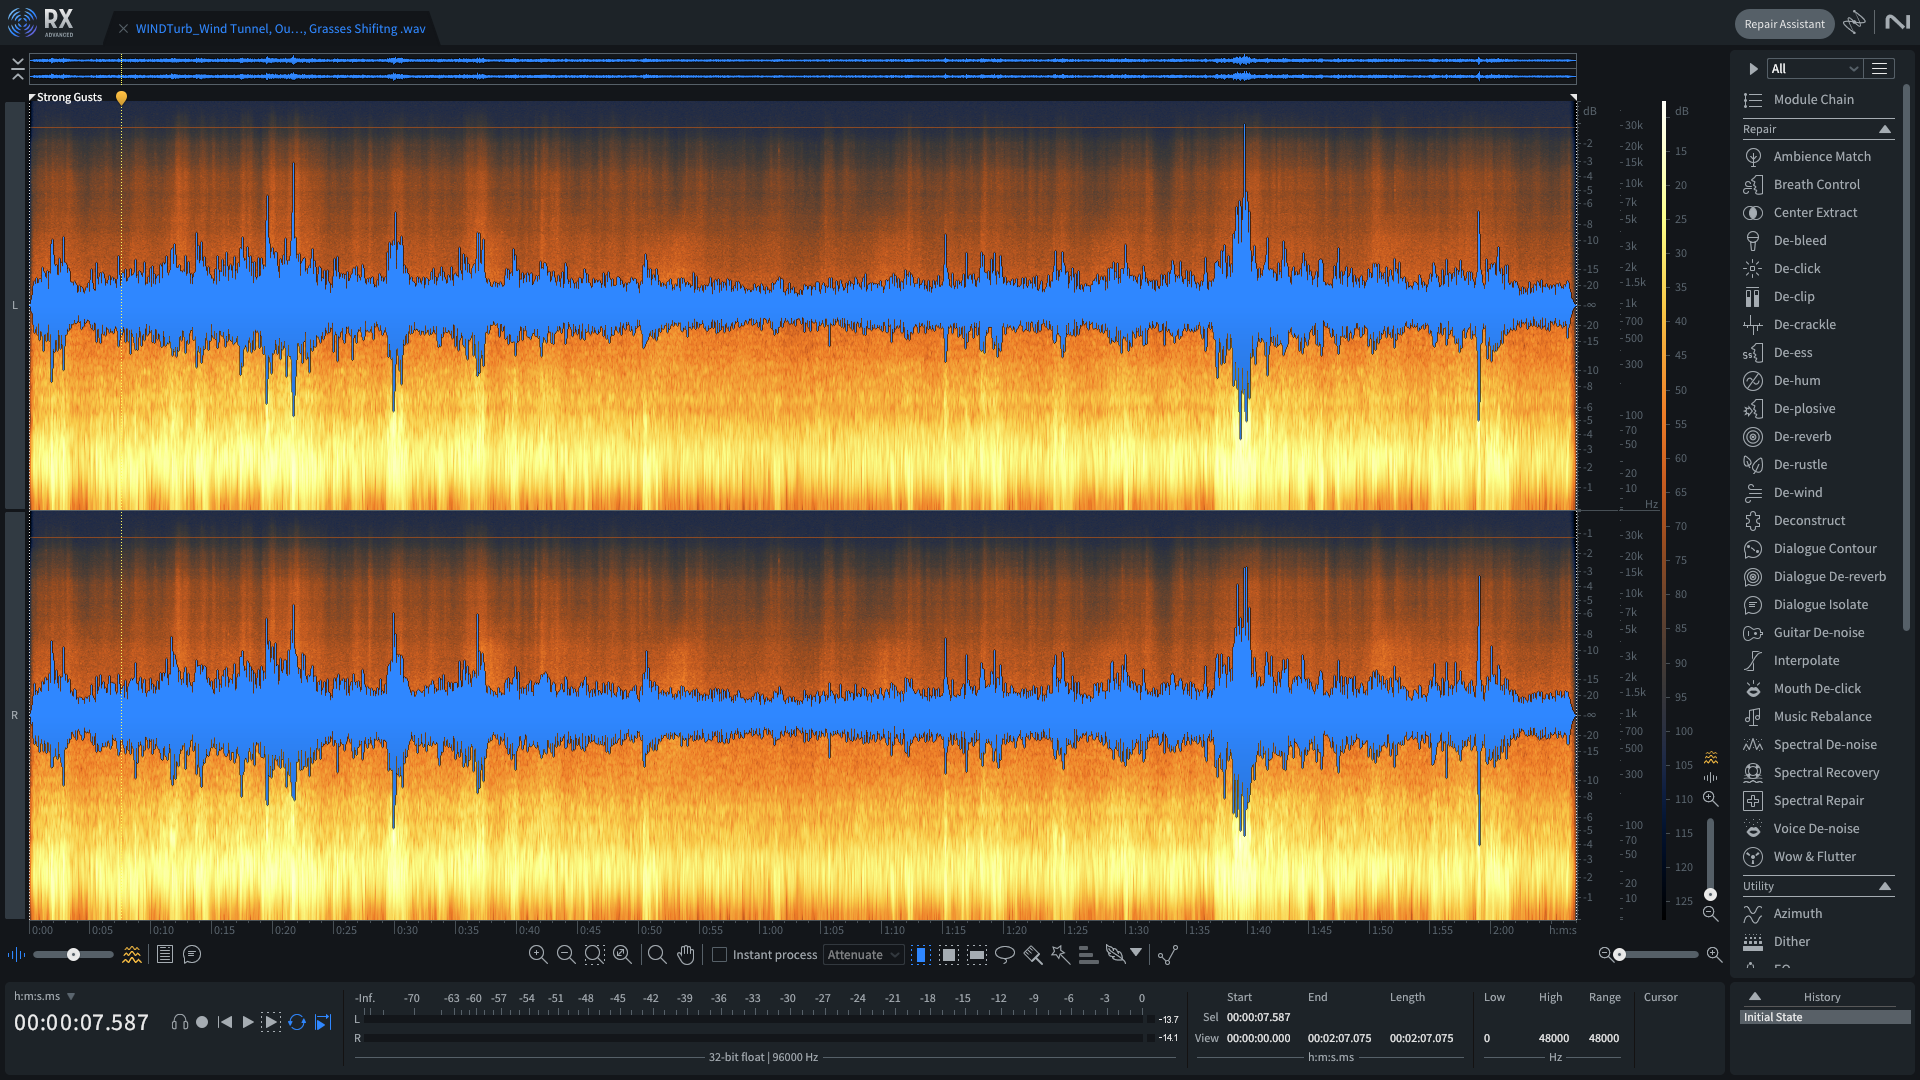
Pulling your files into RX will immediately show you the extent of wind noise. Use this to inform your decisions on which files deserve your time and which may be problematic.
Suppose you have successfully walked the line between recording close to your wind sound source, and placing your mics in a wind-safe location. In that case, you’ve likely achieved a recording that is mostly wind noise free, but perhaps the occasional strong gust may be causing low end wind noise. Sometimes you may have a magic location and your recording needs little editing, and other times you may be faced with an unrecoverable recording due to excessive wind noise. I have found that it is best to work with only the best recordings, as not only does it take a lot of time to ‘fix’ an incredibly noisy recording, but it will also quickly lose its authenticity and become ‘over-edited’.
That being said, iZotope RX can be surprisingly great at reducing minor to medium wind noise. I won’t go into detail in this article on the specifics of how I use RX to remove wind noise, I’ll save that for another post as it will be quite nuanced and lengthy. So I’ll list a few of the main features I use for winds.
A high-pass filter on the EQ module—typically I set it to 20Hz to remove inaudible low-end noise. A lot of what makes strong winds sound present and intense is the quality and volume of the low end, so I try not to reduce it in audible range if I can.
Spectral Repair in ‘Attenuate’ - I love this feature; it is amazingly transparent, reducing volume only within your selection relative to its surroundings. When used correctly on wind noise bursts, it can totally remove the unwanted while keeping all the good stuff. The best part is that its transparent as well, if you have the strength and weighting set well, it will be seamless and produce no artifacts. This is what I use first every time, as many alternative tools in RX are generative or additive and are much more likely to compromise the recording's authenticity or create audible artifacts. You can set this module to ‘instant process’ as well, which speeds up workflows if your recording has multiple wind noise bursts you want to reduce.
Gain - Keep volume in mind when editing. Try to set each wind track's volume to something that emulates how loud it actually was on the day. This will enhance the library's realism.
Frequency Scale - Extended Log - Pop your frequency scale onto extended log; this expands the visual low end, allowing you to see more detail and create finer, more accurate edits to the low end, where most wind noise appears.
Time Frequency Selection Tool and the Lasso Tool. These tools are what I use to achieve precise wind noise reduction. The more precise you are, the more transparent and unedited your recordings sound.
Be careful to edit only what actually needs it. It is easy to get caught out by looking at the spectrogram and editing too quickly. It is important to slow down and listen, as not all low-end peaks are unwanted wind noise; some are wind interacting with the environment and should not be edited or removed. Wind is dynamic across all audible frequency ranges, and it is important to preserve that variability; otherwise, recordings can begin to sound flat and uninteresting, even if the source material was incredible.
Recording extreme winds is less about chasing a single ‘fix’ or ‘solution’ and more about stacking small, deliberate choices: the right wind protection, a sheltered mic placement, multiple takes from alternate positions, and the safety net of 32-bit recording. Over a year on a Sub-Antarctic island I learned that the best recordings come from accepting the limits of gear, prioritising location, and applying surgical, restrained editing only when necessary. The wind recording that feels most honest is usually the one that required the least work in post.
— Andy Leeder / Out There Audio
p.s. If you enjoyed this article, subscribe to my newsletter below for monthly blogs and new sound releases.